This is a project that has been abandoned for months. When the first time I revisited this project, I could not recall what the purpose of the software. But the name, BVH Re-Assign, suggests that it will enable us to reassign motion data from one joint to another.
Later, I recalled that I began developing this software when I played around with MakeHuman and Blender. MakeHuman, after imported into Blender, accept BVH data, but not all BVH acceptable to MakeHuman. So I thought, what if I develop a software that can copy motion data from any BVH to a BVH structure (or in Blender called empties) that has been proven to be acceptable to MakeHuman.
...Something happened and I abandoned the project.
Although I have left the world of 3D, but I guess I will return and need this functionaly. So here I am, continuing the project.
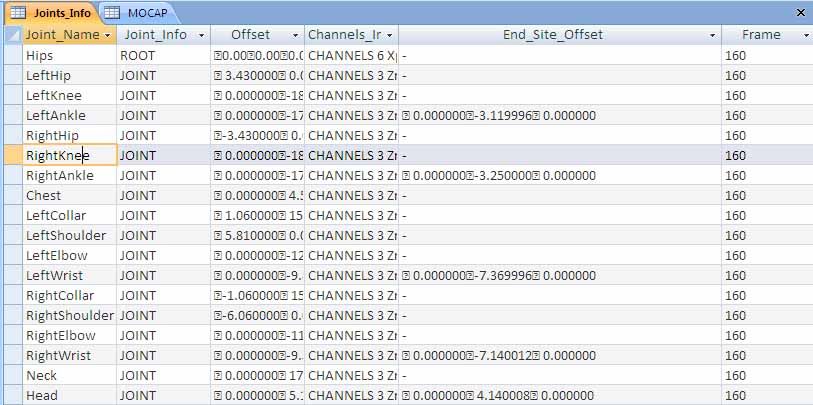
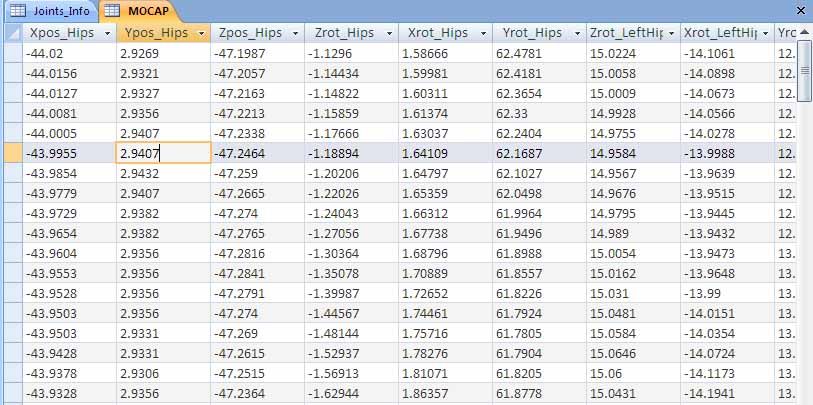
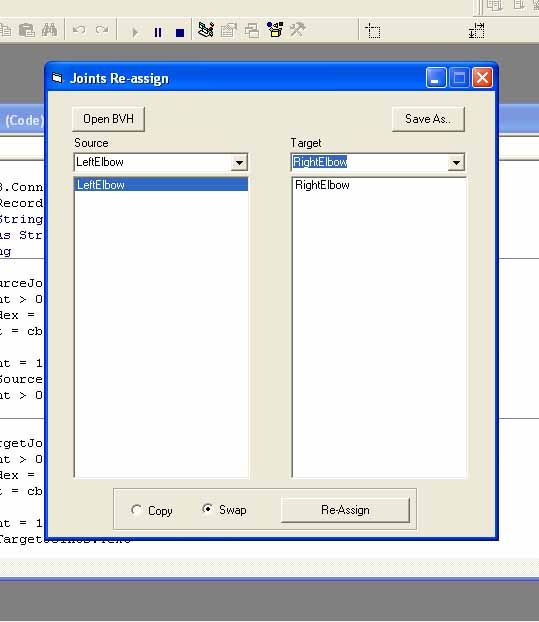
In this stage, the software can copy or swap motion data between two joints. It’s not there yet but It’s getting there.
How it works?
Those who familiar with Visual Basic 6 can download the project here. Those who familiar with different programming language, the workflow is as follow:
First, extract joint information and motion data into two different table. My tables are: JOINTS_INFO and MOCAP.
The former is created manually in MS Access, the later is created during the runtime, because I never know how many joints the software will deal with.
When the user select joints to copy from and to copy to, the software will copy the xrot, yrot, dan zrot fields of both joints. Then, depending on which operation choosen by the user, the software will copy or swap the motion data dan copy them back to original table.
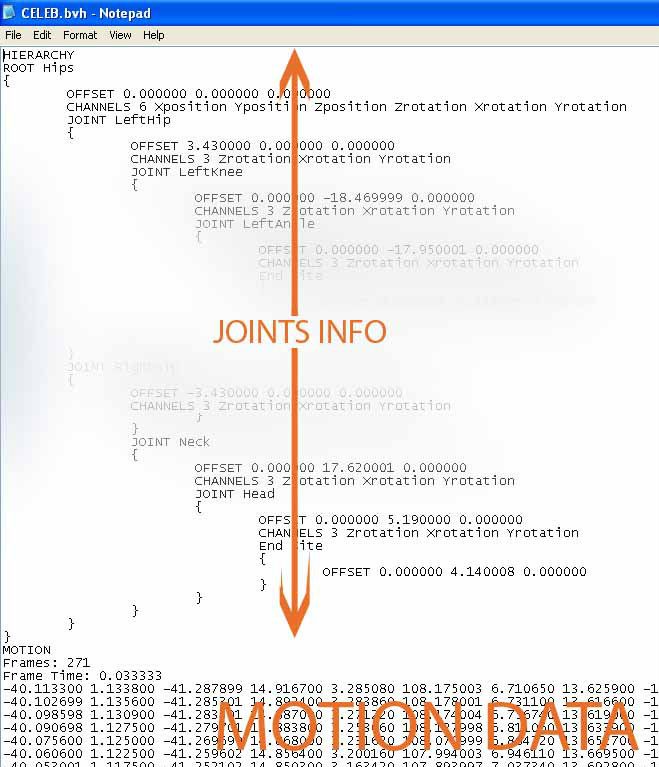
Finally, the software will create an output BVH based on modified data. BVH Hacker showed me so far so good.
Stay tune, hopely I can make it.
Thursday, December 20, 2012
Sunday, October 28, 2012
DIY Camera Slider Idea
After I made a test footage for my DIY Jib, I recalled my DIY Camera Slider Project that has been abandoned for along time.
The idea is to use a Tile Cutter like this:
Parts that I will use for DIY Slider are:
To improve setup time, I will not use any nuts and bolt, but instead I will use a rubber chord.
I drill a hole on the rail holders for the chord:
Here is when the chord is attached to the rail holders:
Almost done:
Now I have to make a camera plate and rail holder plates.
Hmm, Maybe I'll just steal my wife's chopping board like before and make the camera plate and rail holder plates from it.
Make Yourself a Tripod Quick Release Plate
Did you lose your tripod quick release plate and cannot find the replacement in any store even at eBay? The best suggestion will be to buy a new tripod. But what if this is not the right time to spend money for another tripod? I suggest you to make yourself your tripod quick release plate.
It is easy and takes no more than 15 minutes, if you have the right tool.
What you need is a thick (no less than 8 mm) plastic chopping board, you can steal it from your wife.
Tools that you are going to use:
- Measuring tools
- Hack Saw
- Sand Paper Disc for angle grinder
- angle grinder
- bolt for your camera
Here is how to do it:
Measure your tripod quick release plate receiver.
Cut your chopping board 1 or 2 mm bigger. This is to allow you to fix any error during next process
Sand it to the right angle and the right measurement.
Test it into your tripod quick release plate receiver. You have to make sure that it sits perfectly and you can lock it
Now you have to drill a hole and insert a bolt for your camera.
UPDATE:
Someone asked me to make a Quick Release Plate for his Excell Vipod 300. So, I gave it a try...
Thursday, January 26, 2012
BVH joints renamer
When I load a BVH file into 3DS Max Biped, an error occurs, saying that the naming is not compatible with biped.
To fix the problem, open the BVH in bvhhacker, examine whether there is an extra joints that is not compatible with biped. Try delete it and see if the figure is not falling apart (or the bvhhacker chashes).
Then rename all the joints in accordance with biped bones naming convention.
You can do it in any text editor or word processor, but it is tedious. So I created an application in Visual Basic 6 to make it simple.
Here is the intaller or here.
BIP to BVH Conversion: Video Walkthrough
Here is a video walkthrough showing how to convert BIP to BVH and import the BVH into Blender.
Wednesday, January 25, 2012
Bahasa Dictionary for Papagayo
BIP to BVH Conversion
I have been looking for a way to convert *.bip files to *.bvh, but it seems nobody doing such conversion before. Therefore, I had to figure it out myself how to do that. And here the quick and dirty to do the conversion.
Note: The BVH will be used in Bender.
Software you need: 3DS Max, MotionBuilder, bvhhacker (optional)
As far as I know, 3DS Max is the only software that can read *.bip, so you will need it installed. In 3DS Max, create Biped.
Make sure the biped structure conform the bvh structure (e.g. only have one spine). Rename the bones so that no space in the bones name, since bvh does not allow space in joint name. To make renaming the bones easier, use the script that you can download here. The script is called UI rename floater. Unhide all, select all and run the script. Replace all spaces.
To ensure that BVH resulted from the conversion is useable, I suggest you to rename the bones/joints in accordance with BVH joint name convention.
Save the MAX file, so that you do not have to do the above steps all over again when you need to convert another bip file.
Load the bip file into the biped, edit or play the animation, then export it as FBX.
Fire up MotionBuilder then load the FBX.
Delete the fbx_root. You have to delete the fbx_root, because if you don't, your BVH will not move from its original position while performing the motion. When you delete the fbx_root, the figure will face or move toward the ground, but it is okay since we can rotate it in Blender.
Finally export the scene as BVH.
You can check the BVH in BVHhacker.
When the BVH is imported to Blender, it turned out that we do not have to rotate the BVH empties/bones.
That is it.
Subscribe to:
Posts (Atom)